Featured Post

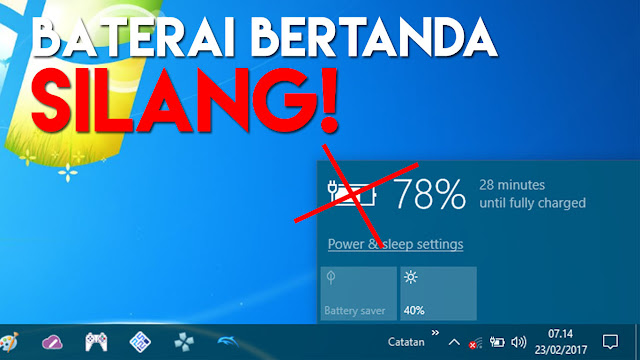
5 Cara AMPUH Menghilangkan Tanda Silang pada Baterai Laptop (fix)

Punya masalah laptop muncul tanda silang merah di indikator baterai? Pernahkah kamu mengalami keadaan di mana icon pada baterai laptop kesay...

Friday, November 5, 2021

Fungsi-Fungsi Shortcut Keyboard Windows 7 Terlengkap

Daftar Fungsi-Fungsi Shortcut Keyboard pada Windows 7 Terlengkap dan Terbaru. Pintasan keyboard adalah tombol atau kombinasi tombol yang menyediakan cara alternatif untuk melakukan sesuatu yang biasanya Anda lakukan dengan mouse.
Shortcut Keyboard Windows 7

Fungsi Shortcut Keyboard Windows 7

Press this key

To do this

F1

Display Help

Ctrl + C (or Ctrl + Insert)

Copy the selected item

Ctrl + X

Cut the selected item

Ctrl + V (or Shift + Insert)

Paste the selected item

Ctrl + Z

Undo an action

Ctrl + Y

Redo an action

Delete (or Ctrl + D)

Delete the selected item and move it to the Recycle Bin

Shift + Delete

Delete the selected item without moving it to the Recycle Bin first

F2

Rename the selected item

Ctrl + Right Arrow

Move the cursor to the beginning of the next word

Ctrl + Left Arrow

Move the cursor to the beginning of the previous word

Ctrl + Down Arrow

Move the cursor to the beginning of the next paragraph

Ctrl + Up Arrow

Move the cursor to the beginning of the previous paragraph

Ctrl + Shift with an arrow key

Select a block of text

Shift with any arrow key

Select more than one item in a window or on the desktop, or select text within a document

Ctrl with any arrow key + Spacebar

Select multiple individual items in a window or on the desktop

Ctrl + A

Select all items in a document or window

F3

Search for a file or folder

Alt + Enter

Display properties for the selected item

Alt + F4

Close the active item, or exit the active program

Alt + Spacebar

Open the shortcut menu for the active window

Ctrl + F4

Close the active document (in programs that allow you to have multiple documents open simultaneously)

Alt + Tab

Switch between open items

Ctrl + Alt + Tab

Use the arrow keys to switch between open items

Ctrl + Mouse scroll wheel

Change the size of icons on the desktop

Windows logo key  Picture of the Windows logo key + Tab

Cycle through programs on the taskbar by using Aero Flip 3-D

Ctrl+Windows logo key Picture of the Windows logo key + Tab

Use the arrow keys to cycle through programs on the taskbar by using Aero Flip 3-D

Alt + Esc

Cycle through items in the order in which they were opened

F6

Cycle through screen elements in a window or on the desktop

F4

Display the address bar list in Windows Explorer

Shift + F10

Display the shortcut menu for the selected item

Ctrl + Esc

Open the Start menu

Alt + underlined letter

Display the corresponding menu

Alt + underlined letter

Perform the menu command (or other underlined command)

F10

Activate the menu bar in the active program

Right Arrow

Open the next menu to the right, or open a submenu

Left Arrow

Open the next menu to the left, or close a submenu

F5 (or Ctrl + R)

Refresh the active window

Alt + Up Arrow

View the folder one level up in Windows Explorer

Esc

Cancel the current task

Ctrl + Shift + Esc

Open Task Manager

Shift when you insert a CD

Prevent the CD from automatically playing

Left Alt + Shift

Switch the input language when multiple input languages are enabled

Ctrl+Shift

Switch the keyboard layout when multiple keyboard layouts are enabled

Right or Left Ctrl + Shift

Change the reading direction of text in right-to-left reading languages

The following table contains keyboard shortcuts for use in dialog boxes.

Press this key

To do this

Ctrl + Tab

Move forward through tabs

Ctrl + Shift + Tab

Move back through tabs

Tab

Move forward through options

Shift + Tab

Move back through options

Alt + underlined letter

Perform the command (or select the option) that goes with that letter

Enter

Replaces clicking the mouse for many selected commands

Spacebar

Select or clear the check box if the active option is a check box

Arrow keys

Select a button if the active option is a group of option buttons

F1

Display Help

F4

Display the items in the active list

Backspace

Open a folder one level up if a folder is selected in the Save As or Open dialog box

The following table contains keyboard shortcuts that use the Windows logo key Picture of the Windows logo key

Press this key

To do this

Windows logo key Picture of the Windows logo key

Open or close the Start menu.

Windows logo key Picture of the Windows logo key + Pause

Display the System Properties dialog box.

Windows logo key Picture of the Windows logo key + D

Display the desktop.

Windows logo key Picture of the Windows logo key + M

Minimize all windows.

Windows logo key Picture of the Windows logo key + Shift + M

Restore minimized windows to the desktop.

Windows logo key Picture of the Windows logo key + E

Open Computer.

Windows logo key Picture of the Windows logo key + F

Search for computers (if you're on a network).

Windows logo key Picture of the Windows logo key + L

Lock your computer or switch users.

Windows logo key Picture of the Windows logo key + R

Open the Run dialog box.

Windows logo key Picture of the Windows logo key + T

Cycle through programs on the taskbar.

Windows logo key Picture of the Windows logo key + number

Start the program pinned to the taskbar in the position indicated by the number. If the program is already running, switch to that program.

Shift+Windows logo key Picture of the Windows logo key + number

Start a new instance of the program pinned to the taskbar in the position indicated by the number.

Ctrl+Windows logo key Picture of the Windows logo key + number

Switch to the last active window of the program pinned to the taskbar in the position indicated by the number.

Alt+Windows logo key Picture of the Windows logo key + number

Open the Jump List for the program pinned to the taskbar in the position indicated by the number.

Windows logo key Picture of the Windows logo key + Tab

Cycle through programs on the taskbar by using Aero Flip 3-D.

Ctrl+Windows logo key Picture of the Windows logo key + Tab

Use the arrow keys to cycle through programs on the taskbar by using Aero Flip 3-D.

Ctrl+Windows logo key Picture of the Windows logo key + B

Switch to the program that displayed a message in the notification area.

Windows logo key Picture of the Windows logo key + Spacebar

Preview the desktop.

Windows logo key Picture of the Windows logo key + Up Arrow

Maximize the window.

Windows logo key Picture of the Windows logo key + Left Arrow

Maximize the window to the left side of the screen.

Windows logo key Picture of the Windows logo key + Right Arrow

Maximize the window to the right side of the screen.

Windows logo key Picture of the Windows logo key + Down Arrow

Minimize the window.

Windows logo key Picture of the Windows logo key + Home

Minimize all but the active window.

Windows logo key Picture of the Windows logo key + Shift + Up Arrow

Stretch the window to the top and bottom of the screen.

Windows logo key Picture of the Windows logo key + Shift + Left Arrow or Right Arrow

Move a window from one monitor to another.

Windows logo key Picture of the Windows logo key + P

Choose a presentation display mode.

Windows logo key Picture of the Windows logo key + G

Cycle through gadgets.

Windows logo key Picture of the Windows logo key + U

Open Ease of Access Center.

Windows logo key Picture of the Windows logo key + X

Open Windows Mobility Center.

Press this key

To do this

Ctrl + N

Open a new window

Ctrl + W

Close the current window

Ctrl + Shift + N

Create a new folder

End

Display the bottom of the active window

Home

Display the top of the active window

F11

Maximize or minimize the active window

Ctrl + Period (.)

Rotate a picture clockwise

Ctrl + Comma (,)

Rotate a picture counter-clockwise

Num Lock + Asterisk (*) on numeric keypad

Display all subfolders under the selected folder

Num Lock + Plus Sign (+) on numeric keypad

Display the contents of the selected folder

Num Lock + Minus Sign (-) on numeric keypad

Collapse the selected folder

Left Arrow

Collapse the current selection (if it's expanded), or select the parent folder

Alt + Enter

Open the Properties dialog box for the selected item

Alt + P

Display the preview pane

Alt + Left Arrow

View the previous folder

Backspace

View the previous folder

Right Arrow

Display the current selection (if it's collapsed), or select the first subfolder

Alt + Right Arrow

View the next folder

Alt + Up Arrow

View the parent folder

Ctrl + Shift + E

Display all folders above the selected folder

Ctrl + Mouse scroll wheel

Change the size and appearance of file and folder icons

Alt + D

Select the address bar

Ctrl + E

Select the search box

Ctrl + F

Select the search box

The following table contains keyboard shortcuts for working with items on the desktop taskbar.

Press this key

To do this

Shift + click a taskbar button

Open a program or quickly open another instance of a program

Ctrl + Shift + click a taskbar button

Open a program as an administrator

Shift + right-click a taskbar button

Show the window menu for the program

Shift + right-click a grouped taskbar button

Show the window menu for the group

Ctrl + click a grouped taskbar button

Cycle through the windows of the group

The following table contains keyboard shortcuts for working with Remote Desktop Connection.

Press this key

To do this

Alt + Page Up

Move between apps from left to right

Alt + Page Down

Move between apps from right to left

Alt + Insert

Cycle through programs in the order that they were started in.

Alt + Home

Display the Start menu.

Ctrl + Alt + Break

Switch between a window and full screen

Ctrl + Alt + End

Display the Windows Securitydialog box

Alt + Delete

Display the system menu.

Ctrl + Alt + Minus Sign (-) on the numeric keypad

Place a copy of the active window, within the client, on the Terminal server clipboard (provides the same functionality as pressing Alt+PrtScn on a local computer).

Ctrl + Alt + Plus Sign (+) on the numeric keypad

Place a copy of the entire client window area on the Terminal server clipboard (provides the same functionality as pressing PrtScn on a local computer).

Ctrl + Alt + Right Arrow

“Tab” out of the Remote Desktop controls to a control in the host program (for example, a button or a text box). Useful when the Remote Desktop controls are embedded in another (host) program.

Ctrl + Alt + Left Arrow

“Tab” out of the Remote Desktop controls to a control in the host program (for example, a button or a text box). Useful when the Remote Desktop controls are embedded in another (host) program.

Note: Ctrl+Alt+Break and Ctrl+Alt+End are available in all Remote Desktop sessions, even when you've set up the remote computer to recognize Windows keyboard shortcuts.

The following table contains keyboard shortcuts for working with Paint.

Press this key

To do this

Ctrl + N

Create a new picture

Ctrl + O

Open an existing picture

Ctrl + S

Save changes to a picture

F12

Save the picture as a new file

Ctrl + P

Print a picture

Alt + F4

Close a picture and its Paint window

Ctrl + Z

Undo a change

Ctrl + Y

Redo a change

Ctrl + A

Select the entire picture

Ctrl + X

Cut a selection

Ctrl + C

Copy a selection to the Clipboard

Ctrl + V

Paste a selection from the Clipboard

Right Arrow

Move the selection or active shape right by one pixel

Left Arrow

Move the selection or active shape left by one pixel

Down Arrow

Move the selection or active shape down by one pixel

Up Arrow

Move the selection or active shape up by one pixel

Esc

Cancel a selection

Delete

Delete a selection

Ctrl + B

Bold selected text

Ctrl + +

Increase the width of a brush, line, or shape outline by one pixel

Ctrl + -

Decrease the width of a brush, line, or shape outline by one pixel

Ctrl + U

Underline selected text

Ctrl + E

Open the Properties dialog box

Ctrl + W

Open the Resize and Skew dialog box

Ctrl + Page Up

Zoom in

Ctrl + Page Down

Zoom out

F11

View a picture in full-screen mode

Ctrl + R

Show or hide the ruler

Ctrl + G

Show or hide gridlines

F10 or Alt

Display keytips

Shift + F10

Show the current shortcut menu

F1

Open Paint Help

The following table contains keyboard shortcuts for working with WordPad.

Press this key

To do this

Ctrl + N

Create a new document

Ctrl + O

Open an existing document

Ctrl + S

Save changes to a document

F12

Save the document as a new file

Ctrl + P

Print a document

Alt + F4

Close WordPad

Ctrl + Z

Undo a change

Ctrl + Y

Redo a change

Ctrl + A

Select the entire document

Ctrl + X

Cut a selection

Ctrl + C

Copy a selection to the Clipboard

Ctrl + V

Paste a selection from the Clipboard

Ctrl + B

Make selected text bold

Ctrl + I

Italicize selected text

Ctrl + U

Underline selected text

Ctrl + =

Make selected text subscript

Ctrl + Shift + =

Make selected text superscript

Ctrl + L

Align text left

Ctrl + E

Align text center

Ctrl + R

Align text right

Ctrl + J

Justify text

Ctrl + 1

Set single line spacing

Ctrl + 2

Set double line spacing

Ctrl + 5

Set line spacing to 1.5

Ctrl + Shift + >

Increase the font size

Ctrl + Shift + <

Decrease the font size

Ctrl + Shift + A

Change characters to all capitals

Ctrl + Shift + L

Change the bullet style

Ctrl + D

Insert a Microsoft Paint drawing

Ctrl + F

Find text in a document

F3

Find the next instance of the text in the Find dialog box

Ctrl + H

Replace text in a document

Ctrl + Left Arrow

Move the cursor one word to the left

Ctrl + Right Arrow

Move the cursor one word to the right

Ctrl + Up Arrow

Move the cursor to the line above

Ctrl + Down Arrow

Move the cursor to the line below

Ctrl + Home

Move to the beginning of the document

Ctrl + End

Move to the end of the document

Ctrl + Page Up

Move up one page

Ctrl + Page Down

Move down one page

Ctrl + Delete

Delete the next word

F10

Display keytips

Shift + F10

Show the current shortcut menu

F1

Open WordPad Help

The following table contains keyboard shortcuts for working with Calculator.

Press this key

To do this

Alt + 1

Switch to Standard mode

Alt + 2

Switch to Scientific mode

Alt + 3

Switch to Programmer mode

Alt + 4

Switch to Statistics mode

Ctrl + E

Open date calculations

Ctrl + H

Turn calculation history on or off

Ctrl + U

Open unit conversion

Alt + C

Calculate or solve date calculations and worksheets

F1

Open Calculator Help

Ctrl + Q

Press the M- button

Ctrl + P

Press the M+ button

Ctrl + M

Press the MS button

Ctrl + R

Press the MR button

Ctrl + L

Press the MC button

%

Press the % button

F9

Press the +/– button

/

Press the / button

*

Press the * button

+

Press the + button

-

Press the – button

R

Press the 1/× button

@

Press the square root button

0–9

Press the number buttons (0–9)

=

Press the = button

.

Press the . (decimal point) button

Backspace

Press the backspace button

Esc

Press the C button

Del

Press the CE button

Ctrl + Shift + D

Clear the calculation history

F2

Edit the calculation history

Up Arrow key

Navigate up in the calculation history

Down Arrow key

Navigate down in the calculation history

Esc

Cancel editing the calculation history

Enter

Recalculate the calculation history after editing

F3

Select Degrees in Scientific mode

F4

Select Radians in Scientific mode

F5

Select Grads in Scientific mode

I

Press the Inv button in Scientific mode

D

Press the Mod button in Scientific mode

Ctrl + S

Press the sinh button in Scientific mode

Ctrl + O

Press the cosh button in Scientific mode

Ctrl + T

Press the tanh button in Scientific mode

(

Press the ( button in Scientific mode

)

Press the ) button in Scientific mode

N

Press the ln button in Scientific mode

;

Press the Int button in Scientific mode

S

Press the sin button in Scientific mode

O

Press the cos button in Scientific mode

T

Press the tan button in Scientific mode

M

Press the dms button in Scientific mode

P

Press the pi button in Scientific mode

V

Press the F-E button in Scientific mode

X

Press the Exp button in Scientific mode

Q

Press the x^2 button in Scientific mode

Y

Press the x^y button in Scientific mode

#

Press the x^3 button in Scientific mode

L

Press the log button in Scientific mode

!

Press the n! button in Scientific mode

Ctrl + Y

Press the y√x button in Scientific mode

Ctrl + B

Press the 3√x button in Scientific mode

Ctrl + G

Press the 10x button in Scientific mode

F5

Select Hex in Programmer mode

F6

Select Dec in Programmer mode

F7

Select Oct in Programmer mode

F8

Select Bin in Programmer mode

F12

Select Qword in Programmer mode

F2

Select Dword in Programmer mode

F3

Select Word in Programmer mode

F4

Select Byte in Programmer mode

K

Press the RoR button in Programmer mode

J

Press the RoL button in Programmer mode

<

Press the Lsh button in Programmer mode

>

Press the Rsh button in Programmer mode

%

Press the Mod button in Programmer mode

(

Press the ( button in Programmer mode

)

Press the ) button in Programmer mode

|

Press the Or button in Programmer mode

^

Press the Xor button in Programmer mode

~

Press the Not button in Programmer mode

&

Press the And button in Programmer mode

A–F

Press the A–F buttons in Programmer mode

Spacebar

Toggles the bit value in Programmer mode

A

Press the Average button in Statistics mode

Ctrl + A

Press the Average Sq button in Statistics mode

S

Press the Sum button in Statistics mode

Ctrl+S

Press the Sum Sq button in Statistics mode

T

Press the S.D. button in Statistics mode

Ctrl+T

Press the Inv S.D. button in Statistics mode

D

Press the CAD button in Statistics mode

The following table contains keyboard shortcuts for working with Windows Journal.

Press this key

To do this

Ctrl + N

Start a new note

Ctrl + O

Open a recently used note

Ctrl + S

Save changes to a note

Ctrl + Shift + V

Move a note to a specific folder

Ctrl + P

Print a note

Alt + F4

Close a note and its Journal window

Ctrl + Z

Undo a change

Ctrl + Y

Redo a change

Ctrl + A

Select all items on a page

Ctrl + X

Cut a selection

Ctrl + C

Copy a selection to the Clipboard

Ctrl + V

Paste a selection from the Clipboard

Esc

Cancel a selection

Delete

Delete a selection

Ctrl + F

Start a basic find

Ctrl + G

Go to a page

F5

Refresh find results

F5

Refresh the note list

F6

Toggle between a note list and a note

Ctrl + Shift + C

Display a shortcut menu for column headings in a note list

F11

View a note in full-screen mode

F1

Open Journal Help

The following table contains keyboard shortcuts for working with the Help viewer.

Press this key

To do this

Alt + C

Display the Table of Contents

Alt + N

Display the Connection Settings menu

F10

Display the Options menu

Alt + Left Arrow

Move back to the previously viewed topic

Alt + Right Arrow

Move forward to the next (previously viewed) topic

Alt + A

Display the customer support page

Alt + Home

Display the Help and Support home page

Home

Move to the beginning of a topic

End

Move to the end of a topic

Ctrl + F

Search the current topic

Ctrl + P

Print a topic

F3

Move the cursor to the search box

Adobe Audition CC Error: The specified location is not permitted (fix)

Adobe Audition tidak bisa buat multitrack, error permitted.
Artikel kali ini singkat aja kok, cuma mau ngasih tau cara mengatasi Adobe Audition yang error ketika hendak membuat multitrack session. Jadi ketika klik "multitrack", yang muncul malah pesan error seperti gambar di bawah:
ketika klik "multitrack", muncul pesan error
Kalo tulisan errornya nggk kelihatan, kira-kira tulisannya seperti ini:
"The specified location is reserved by the operating system and is not permitted."
"Please choose a different location."
Kejadian error tersebut baru saja kami alami 5 menit yang lalu 😢, dan sempat membuat kami bingung dikit... Padahal OS masih fresh, baru aja selesai install ulang Windows 10 build 1809. (update OS paling baru)

Mengatasi Adobe Audition error permitted...

Singkat cerita, akhirnya telah kami temukan sebuah cara dalam mengatasi error tersebut. Caranya sangat-sangat super duper mudah 😒, apa itu???

Ternyata cukup lakukan ubah nama save file multitrack yang ingin kamu buat tadi. Dan yang paling PENTING, nama save file tersebut TIDAK BOLEH pakai "." / titik.

  1. Buka Adobe Audition CC
    Audition CC
  2. Klik "multitrack"
    Buka multitrack
  3. Beri nama save file. (jangan pakai titik)
    Beri nama, tapi jangan pakai titik
  4. Simpan file. (otomatis multitrack akan terbuka)
    Multitrack sudah bisa terbuka 😀👍
  5. Selesai.

Oke gan, itu aja tutorial singkatnya ya... Sebenarnya nggak penting-penting amat kok. Tapi kalo emang ada yang ngalamin masalah konyol yang sama seperti kami diatas, moga bisa jadi info yang berguna bagi yg baca.

Catatan...

Ingat, poin-poin yang kami tuliskan di atas merupakan pendapat pribadi dari kami sendiri. Jadi wajar saja jika terdapat hal yang tidak sesuai/sependapat dengan kamu-kamu yang sedang membaca artikel ini.

Sedangkan untuk kamu-kamu yang tidak sengaja kesasar di blog ini, mending JANGAN langsung keluar. Lebih baik liat-liat dulu Daftar Isi dari kumpulan artikel yang telah kami tulis blog sederhana ini.

Bisa jadi, kamu akan menemukan artikel terkait lainnya.

Itu saja sarannya...

Sekian...

Itulah artikel mengenai Adobe Audition CC Error: The specified location is not permitted (fix). Semoga informasi yang kami tuliskan melalui artikel di atas bisa bermanfaat bagi kalian yang membacanya.

Mohon maaf jika ada salah kata,

Sampai jumpa di lain waktu.

Terima kasih
“Tolong bagikan ke teman kamu jika menurutmu ini bermanfaat”


Selain sebagai media informasi teknologi, kami juga berbagi artikel terkait bisnis kreator.

4 Resiko &amp; Bahaya Menggunakan OS Windows BAJAKAN (tercyduk)

Memakai Windows Bajakan, Bahaya Gak Sih?
Software versi TANI, alias BAJAKAN
Masih ingatkah kalian dengan artikel yang kami tulis beberapa hari yang lalu mengenai penggunaan software bajakan, sama saja dengan mencuri? Jika kalian belum membacanya, silahkan baca terlebih dahulu artikel pencuri software bajakan.

Kembali ke topik pembahasan, mungkin dari kalian yang saat ini masih memakai software bajakan muncul pertanyaan di benak kalian,
"Sebenarnya bahaya gak sih menggunakan Windows bajakan?"
"Apa dampak negatif ketika menggunakan Windows bajakan?"
Punya pertanyaan seperti itu?

Menurut beberapa blog lain...

Pembahasan tentang bahayanya menggunakan software bajakan telah di sampaikan oleh blog-blog lain (cukup banyak). Dan dari poin-poin yang di bahas pada blog lain tersebut, meyebutkan dampak Windows bajakan itu seperti di bawah ini.

1. Rentan Terhadap Virus?

Windows bajakan rentan virus
Apakah 100% benar sistem operasi (Windows) hasil dari "membajak" itu "lebih rentan" dari virus?

Menurut saya...

Hal tersebut memang "cukup" benar. Namun, menurut kami pribadi, biarpun Windows itu "Asli/ORI" ataupun "Bajakan", tetap saja Windows tersebut secara teknis "sama", alias keduanya sama-sama "bisa" rentan terhadap virus juga.

Seberapa amankah Windows yang sedang di gunakan itu lebih tergantung kepada si pemakai komputer Windows itu sendiri. Jika si pemakai Windows itu "tahu/megerti" apa yang sedang ia lakukan, maka kemungkinan besar keadaan Windows akan aman-aman saja.

Perbedaan mendasar mengapa Windows asli/ORI itu di katakan "lebih aman" terhadap virus di karenakan Windows ORI ini mendapat update langsung dari Microsoft.

Berbeda dengan Windows hasi "membajak". Mereka (pengguna bajakan) harus mematikan fitur update melalui pengaturan Windows. Jika tidak, maka Windows hasil "membajak" tersebut akan terdeteksi oleh Microsoft ketika si pengguna "bajakan" itu sedang online.

Mungkin karena itulah kebanyakan orang mengatakan bahwa Windows asli/ORI tersebut "lebih aman" dari virus. Namun, apakah hanya dengan bergantung kepada update dari Microsoft bisa membuat keadaan Windows 100% aman dari "Virus Jahat"?

Semua itu lebih tergantung pada si pengguna dan tergantung pula dengan "sikon". (situasi dan kondisi)

2. Kinerja PC/Laptop yang Buruk?

Kinerja yang semakin buruk
Beberapa orang menganggap bahwa Windows Bajakan dengan Windows ORI itu berbeda dalam hal peforma. Benarkah seperti itu?

Menurut saya...

Bagi saya, peforma yang di hasilkan oleh Windows bajakan maupun yang ORI itu tidak ada bedanya alias "sama".

Malahan ketika kalian membeli sebuah laptop yang bundling dengan Windows ORI, keadaan Windows ORI tersebut sudah terinstall banyak aplikasi bawaan vendor (merk) tertentu yang justru memberatkan sistem karena aplikasi bawaan tersebut aktif di latar belakang.

Jadi, peforma komputer yang buruk bukan 100% dampak dari Windows hasil dari membajak. Windows dengan gelar "Original" pun punya resiko peforma menurun yang sama.

3. Tempat Berkembang Biaknya Virus?

Tempat berkembangnya virus
Untuk poin ini kemungkinan besar benar, karena memang Windows bajakan tidak mendapat lindungan Microsoft melalui update-updatenya.

Namun sekali lagi, hal ini juga tergantung dari si pengguna perangkat komputer itu sendiri.

Walaupun Windows yang di pakai ORI, namun bila si pengguna tidak tahu menahu tentang seluk-beluk komputer, maka tetap saja virus akan mudah bersarang pada komputer tersebut, biarpunn OS Windows yang di pakai ORI.

Dampak positif maupun negatif masih tetap ada.

4. Pendapat Kalian?

Punya pendapat lain?
Menurut kalian, apakah Windows bajakan dengan ORI itu memiliki perbedaan dalam hal peforma atau pun kerentanan terhadap virus?

Ataukah kalian memiliki pendapat lain tentang Windows Bajakan maupun ORI?

Catatan...

Perlu kalian ketahui bahwa poin-poin di atas merupakan opini dari kami ketika menanggapi bahaya atau tidaknya menggunakan Windows bajakan. Terutama dalam hal perbebedaan peforma maupun kerentanan terhadap virus.

Tidak ada niatan untuk melebih-lebihkan dalam hal penggunaan Windows Bajakan.

Kesimpulan...

Kesimpulannya, biarpun Windows yang di gunakan itu bajakan atau pun ORI, tetap saja resiko serangan terhadap virus tetap ada. Semua itu tergantung pada si pengguna perangkat komputer tersebut.

Sekian...

Itulah artikel mengenai 4 Resiko & Bahaya Menggunakan OS Windows BAJAKAN (tercyduk). Semoga yang kami sampaikan di atas bisa bermanfaat bagi kalian semua yang membacanya.

Sampai jumpa di lain kesempatan,
Terima kasih.


Selain sebagai media informasi teknologi, kami juga berbagi artikel terkait bisnis kreator.

Thursday, November 4, 2021

Perbaiki Laptop Acer E1-470 Layar Bergaris, Pake SANDAL JEPIT?

Memperbaiki Laptop Acer E1-470 Layar Bergaris, ternyata bisa di lakukan pake sendal jepit.
Memperbaiki Laptop Acer E1-470 Layar Bergaris, ternyata bisa di lakukan pake sendal jepit.
Bukan kami bermaksud sok pintar, tapi hanya ingin berbagi sebuah pengalaman konyol dalam memeperbaiki laptop Acer E1-470 yang mempunyai masalah layar bergaris vertikal. (dari atas kebawah)

Jadi ketika laptop tersebut dihidupkan, maka tampilan layarnya akan muncul garis lurus dari atas hingga kebawah. Kalo di jelaskan melalui tulisan seperti ini memang terlihat membingungkan dan nggk jelas apa maksudnya. Mending kalian lihat aja gambar penampakan layarnya di bawah ini...
Laptop Acer E1-470 terdapat garis vertikal di layar
Keadaan layar bergaris tersebut, menurut beberapa peristiwa yang pernah kami liat (laptop milik sendiri, dan orang lain) terkadang mucul secara tiba-tiba dan tanpa sebab apapun. (dalam kasus tersebut, biasanya di karenakan kamu mendapat produk yang sudah cacat dari pabrik)

Sedangkan masalah layar bergaris lainnya itu di karenakan terkena benturan, cairan dan kejadian fisik lainnya.

Memperbaiki Laptop Acer E1-470 Layar Bergaris

Sempat bingung juga ketika mendapat masalah Laptop Acer E1-470 Layar Bergaris ini, karena memang sebelumnya belum pernah mengalami.

Namun karena terpaksa, di tambah dengan tidak sengajanya kami menemukan sebuah tutorial permasalahannya yang "sama persis" dengan laptop yang kami miliki (E1-470), jadi kami beranikan diri untuk mencoba mengikuti langkah demi langkah tutorial tersebut. (dari Youtube)

Hingga akhirnya jadilah sebuah artikel ini...

Oke langsung aja ya, dari pada kelamaan basa-basi...

Alat & Bahan yang di butuhkan...

Beberapa bahan yang kamu butuhkan dalam melakukan tutorial mengatasi layar Acer E1-470 yang bergaris ini yaitu:

  1. Tentu saja, Sandal Jepit. (bekas)
  2. Laptop Acer E1-470 yang bermasalah
  3. Obeng (cari yang sesuai dengan ukuran baut)

Cukup siapkan ketiga hal yang kami sebutkan di atas, maka kamu sudah bisa lenjut ke tahap berikutnya, yaitu Memperbaiki Laptop Acer E1-470 Layar Bergaris.

  1. Pertama, bongkar terlebih dahulu casing laptop Acer E1-470 dengan cara melepas baut bagian bawah casing, jika sudah maka congkel perlahan. (bisa menggunakan bantuan kartu operator bekas)

  2. Jika sudah terbuka, lanjut ke bongkar casing layar bagian depan. Nah jika bagian depan LCD sudah terbuka, sekarang kalian bisa mengecek LCD-nya dengan cara menekan bagian yang bergaris.

    Dan jika bagian layar bergaris tersebut menjadi "normal" saat di tekan, maka hal tersebut merupakai pertanda baik bahwa layar tersebut kemungkinan besar bisa di perbaiki menggunakan bantuan sandal jepit.

  3. Sekarang potong secukupnya sandal jepit tersebut kemudian tmpelkan pada sisi dalam (bagian bawah) layar LCD yang bergaris tersebut menggunakan lem. Setelah itu tutup kembali casing LCD depan agar potongan sandal jepit tersebut bisa tertahan oleh casing.

    Pastikan juga bahwa garis vertikal tersebut "hilang" ketika potongan sandal jepit tersebut masuk ketika tertekan oleh casing.

  4. Selanjutnya, tinggal tutup kembali asing bagian bawah motherboard/bawah laptop.

  5. Jangan lupa bautnya di pasang juga.

Pasti bingung kan???

Saya tahu kok, pasti kalian yang membaca langkah tutorial di atas merasa kebingungan dan belum ngerti dengan pasti. Karena memang (bagi saya) agak susah menjelaskannya kedalam bentuk teks.

Oleh karena itu, untuk lebih jelasnya silahkan kamu tonton langkah detailnya pada versi video di bawah ini... (bukan bahasa Indonesia)


Bagaimana, sudah jelas???

Kalo ada yang ingin di tanyakan, langsung aja komentar...

Catatan...

Ingat, poin-poin yang kami tuliskan di atas merupakan pendapat pribadi dari kami sendiri. Jadi wajar saja jika terdapat hal yang tidak sesuai/sependapat dengan kamu-kamu yang sedang membaca artikel ini.

Sedangkan untuk kamu-kamu yang tidak sengaja kesasar di blog ini, mending JANGAN langsung keluar. Lebih baik liat-liat dulu Daftar Isi dari kumpulan artikel yang telah kami tulis blog sederhana ini.

Bisa jadi, kamu akan menemukan artikel terkait lainnya.

Itu saja sarannya...

Sekian...

Itulah artikel mengenai Perbaiki Laptop Acer E1-470 Layar Bergaris, Pake SANDAL JEPIT?. Semoga informasi yang kami tuliskan melalui artikel di atas bisa bermanfaat bagi kalian yang membacanya.

Mohon maaf jika ada salah kata,

Sampai jumpa di lain waktu.

Terima kasih
“Tolong bagikan ke teman kamu jika menurutmu ini bermanfaat”
Spesifikasi laptop Acer E1-470
Intel Core i3-3217U 1,8Ghz
GPU IntelHD 4000
500GB HDD
2GB RAM 


Selain sebagai media informasi teknologi, kami juga berbagi artikel terkait bisnis kreator.

8 Cara Mengatasi PC Laptop Lemot Saat Browsing Terkoneksi Internet

Langkah di bawah ini tergolong mudah dalam mengatasi lemot saat browsing
Browsing merupakan suatu kegiatan yang cukup menyenangkan dalam melakukan banyak hal di dunia maya. Mulai dari download film, belajar, cari informasi, nonton film Dilan 1990, main game online, semua bisa di lakukan.

Namun apa jadinya ketika kita sedang asyik-asyiknya berselancar, entah karena apa tiba-tiba keadaan OS pada PC / Laptop menjadi lemot dan lambat saat digunakan browsing di internet?

Tentu hal tersebut sangat menjengkelkan bagi sebagian besar pengguna komputer di seluruh pelosok bumi ini.

Nah karena itulah, mungkin dari kalian akan langsung mencari tahu tentang bagaimana sih cara dalam mengatasi PC / Laptop yang tiba-tiba lemot saat di gunakan internetan menggunakan browser.

Penyebab laptop menjadi lemot saat browsing

Penyebab laptop lemot saat browsing dan internetan
Sebelum itu, ada baiknya jika kamu ketahui terlebih dahulu beberapa penyebab yang memungkinkan terjadinya lemot saat laptop sedang di gunakan browsing atau internetan.

Penyebabnya sudah kami sebutkan satu-persatu di bawah ini.

Yang pertama adalah...

1. Terlalu banyak Add-Ons yang terpasang

Penyebab yang pertama yaitu terlalu banyaknya plugins atau Add-Ons yang terinstall pada browser yang kamu gunakan.

Beberapa browser internet yang menyediakan fitur Add-Ons contohnya adalah Mozilla Firefox, Google Chrome, Opera dan browser kecil lainnya. (tidak terkenal)

Ada kala Plugin / Add-Ons ini sangat membantu dalam mempermudah pengalaman dalam menggunakan browser secara maksimal. Namun di balik itu semua, tentu akan membawa efek samping pula.

Apa efek sampingnya?

Si browser yang kamu gunakan akan bertambah berat, hingga akhirnya membuat PC / laptop menjadi lambat dan lemot saat di gunakan internetan.

2. Terlalu banyak aplikasi di background

Kejadiannya hampir mirip seperti terlalu banyaknya Add-Ons yang terinstall pada browser.

Perbedaannya ini sekarang mengacu pada OS Windows yang biasa di gunakan sebagai sistem operasi.

Semakin banyak aplikasi yang aktif di background, maka akan semakin berat juga proses yang harus di jalankan oleh OS Windows yang berperan sebagai software INDUK.

3. Terlalu banyak services tidak penting aktif

Sudah tahukan kamu, apa itu services?

Services merupakan layanan-layanan (program kecil) yang tersedia pada OS Windows sebagai pelengkap fungsi dari software terkait. Misalnya saja seperti Windows Update, Windows Search, Windows Firewall, Print Spooler, dll.

Semua program / services tersebut memang sangat membantu dan berguna, namun tentu akan memperberat OS Windows jika jumlahnya terlalu banyak yang aktif.

Apalagi jika perangkat PC / Laptop yang di gunakan itu mempunyai spesifikasi yang tergolong rendah dan PAS-PASan.

4. Terlalu banyak file sampah di browser

Yang ini juga bisa menjadi penyebab dari lambatnya browser ketika di gunakan.

Biasanya akan ada banyak sekali file-file histori yang pernah di gunakan dan tersimpan, kemudian menumpuk semakin banyak dan terus bertambah.

Keadaan tersebut akan memperberat proses dari browser dalam menjalankan perintah-perintah dari pengguna browser.

5. Keadaan hardisk yang bermasalah

Bisa saja malah hardisk yang kamu gunakan itu yang bermasalah, hingga berdampak pada lambatnya segala proses yang ada pada OS Windows.

6. Terlalu banyak melakukan multitasking

Pada saat menyalakan komputer, kemungkinan aplikasi yang ter-minimize pada PC / Laptop kamu itu terlalu banyak, hingga akhirnya membuat ruang RAM dari komputer semakin menipis.

Mengatasi laptop lemot saat browsing

Mengatasi laptop lemot saat browsing
Setelah mengetahui beberapa penyebab yang memungkinan laptop menjadi lemot saat browsing, maka sekarang akan kami lanjutkan dengan cara mudah dalam mengatasi keadaan browsing yang lemot tersebut.

Caranya cukup sederhana, yang pertama adalah...

1. Kurangi aplikasi tidak penting

Tentu saja, yang harus kamu lakukan adalah mengurangi beberapa aplikasi tidak penting yang terinstall pada OS Windows yang kamu gunakan.

Tidak perlu semuanya, cukup beberapa saja yang menurutmu jarang di gunakan atau bahkan tidak pernah di gunakan sama sekali.

2. Lakukan hapus data / cache browser

Cobalah untuk melakukan penghapusan data / cache pada browser yang kamu gunakan. Mozilla Firefox dengan Chrome caranya agak berbeda, namun kami yakin pasti kamu sudah bisa melakukannya sendiri.

Setting -> Clear histori / cache

3. Kurangi Add-Ons yang terpasang

Lebih baik kurangi saja beberapa Add-Ons yang jarang di gunakan pada browser.

Atau jika tidak ingin menghapusnya, pilihan alternatifnya adalah dengan cara men-disable beberapa plugin yang tidak penting.

4. Coba lakukan defragment hardisk

Ada kalanya hardisk yang kita gunakan itu perlu di lakukan defragment pada jangka waktu tertentu. Hal tersebut hanya berlaku jika OS yang kamu gunakan masih berOS Windows 7.

Untuk yang sudah Windows 8 dan 10, proses defrag sudah di lakukan secara otomatis.

5. Lakukan scan menggunakan antivirus

Cara berikutnya dalam menghilangkan rasa lambat / lemot pada browser, yaitu dengan melakukan scan pada OS Windows.

Bisa saja OS Windows yang kamu gunakan itu sudah terjangkit suatu virus yang sengaja aktif hingga akhirnya menganggu proses kinerja dari OS Windows.

Cobalah untuk melakukan scanning secara menyeluruh dari partisi C. D, E, dan seterusnya hingga yakin bahwa semua virus telah hilang.

Cara menghilangkan virus, sudah kami tulis pada artikel yang berjudul: Penyebab dan SOLUSI dalam mengatasi laptop yang terkena virus parah.

6. Kurangi aplikasi aktif di background

Segera kurangi beberapa aplikasi yang aktif di latar belakang pada OS Windows. Semakin sedikit, maka semakin ringan tugas yang harus di lakukan oleh Sistem Operasi.

7. Kurangi services yang tidak penting

Kemudian kurangi juga beberapa services OS Windows yang tidak begitu penting.

Misalnya jika kamu jarang menggunakan printer, maka services yang bernama “Print Spooler” boleh kamu disable.

Sebagai info tambahan, beberapa services windows yang aman di hentikan sudah kami tulis pada artikel lain yang berjudul: 21 Services OS Windows yang aman untuk di hentikan

8. Kurangi jumlah multi tasking

Pada saat menggunakan OS Windows, usahakan untuk sedikit saja melakukan kegiatan multi tasking.

Apa itu multi tasking?

Multitasking adalah kegiatan membuka program aplikasi secara bersamaan dalam jumlah yang cukup banyak. (5 - dst, tergantung)

Kesimpulan...

Jadi kesimpulannya adalah, perhatikanlah keadaan OS Windows dan Browser internetmu dengan baik.

Catatan...

Ingat, poin-poin yang kami tuliskan di atas merupakan pendapat pribadi dari kami sendiri. Jadi wajar saja jika terdapat hal yang tidak sesuai/sependapat dengan kamu-kamu yang sedang membaca artikel ini.

Sekian...

Itulah artikel mengenai 8 Cara Mengatasi PC Laptop Lemot Saat Browsing Terkoneksi Internet. Semoga informasi yang kami tuliskan melalui artikel di atas bisa bermanfaat bagi kalian yang membacanya.

Mohon maaf jika ada salah kata,

Sampai jumpa di lain waktu.

Terima kasih
“Tolong bagikan ke teman kamu jika menurutmu ini bermanfaat”


Selain sebagai media informasi teknologi, kami juga berbagi artikel terkait bisnis kreator.

Cara Menghilangkan &quot;test mode&quot; di Windows 10 Pro build 17763 (fix)

Langkah mudah menghilangkan tulisan "test mode" di Windows 10 Pro
Cara ini sebenarnya bisa juga kamu lakukan pada versi OS Windows lain, contohnya seperti Windows 10 Pro, Enterprise, Eduation, dll. Bahkan, Windows 7 dan 8 pun juga bisa pakai cara ini. (cuma berbeda di tulisan angka built-nya saja)

Jadi jika angka build-nya itu bertuliskan "test mode" 17763, 17134, 16299, dll atau berapa pun angkanya SAMA SAJA, karena tiap versi windows yang terupdate sudah pasti akan otomatis berubah juga. (jika file update terinstall)

Oke, langsung saja ya...

Cara Menghilangkan "test mode" di Windows 10 Pro


Jika OS Windows-mu tiba-tiba muncul tulisan "test mode", silahkan coba langkah dibawah ini:

  1. Pertama, buka pencarian Windows, kemudian ketik "CMD", buka as administrator!
    ketik "CMD", buka as administrator!
  2. Jika CMD / Command Prompt sudah terbuka, ketikan perintah "bcdedit -set TESTSIGNING off", kemudian Enter!
    ketik "bcdedit -set TESTSIGNING off"
  3. Tunggu beberapa detik, maka akan muncul tulisan "the operation completed successfully"
    muncul tulisan "the operation completed successfully"
  4. Tutup CMD tadi, kemudian restart PC / Laptop.
    lakukan restart PC / Laptop.
  5. Selesai... (pastikan "test mode" sudah hilang)

Alternatif selain melakukan restart sebenarnya ada juga, yaitu dengan cara melakukan LOG OUT saja sudah auto hilang. (test mode)

Bagaimana jika masih tetap muncul?

Wah, jujur kami kurang tau juga ya misalkan masih saja bisa muncul. Sebab, sejauh ini dengan langkah sederhana di atas selalu berhasil... Tapi dengan asumsi bahwa "keadaan" OS Windows-nya itu 100% sehat / tidak ada error akibat virus dan semacamnya...

Cara cepatnya, mungkin install ulang OS aja... (kalo saya)

Tambahan...

Artikel ini sangat cocok untuk yang lagi nyari tutorial dengan kata kunci dibawah ini:

  • cara hilangkan watermark "test mode" win 10
  • tutorial disable test mode win 10 enterprise
  • fungsi test mode Windows 10 (belum di tulis)
  • penyebabnya apa? (belum diketahui)

Oke, itu saja untuk artikel kali ini...

UPDATE: 5 Mei

Untuk beberapa laptop, sebagian ada yang tidak berpengaruh jika hanya di lakukan LOG OUT saja. Jadi lebih optimalnya, lebih baik lakukan RESTART saja jika tulisan "test mode" belum hilang.

Catatan...

Ingat, poin-poin yang kami tuliskan di atas merupakan pendapat pribadi dari kami sendiri. Jadi wajar saja jika terdapat hal yang tidak sesuai/sependapat dengan kamu-kamu yang sedang membaca artikel ini.

Sedangkan untuk kamu-kamu yang tidak sengaja kesasar di blog ini, mending JANGAN langsung keluar. Lebih baik liat-liat dulu Daftar Isi dari kumpulan artikel yang telah kami tulis blog sederhana ini.

Bisa jadi, kamu akan menemukan artikel terkait lainnya.

Itu saja sarannya...

Sekian...

Itulah artikel mengenai Cara Menghilangkan "test mode" di Windows 10 Pro build 17763. Semoga informasi yang kami tuliskan melalui artikel di atas bisa bermanfaat bagi kalian yang membacanya.

Mohon maaf jika ada salah kata,

Sampai jumpa di lain waktu.

Terima kasih
“Tolong bagikan ke teman kamu jika menurutmu ini bermanfaat”


Selain sebagai media informasi teknologi, kami juga berbagi artikel terkait bisnis kreator.

Wednesday, November 3, 2021

Assassins Creed Unity: Gamepad INPUT LAG? Pakai Cara ini aja

Input delay ketika menggunakan gamepad ya?
Cuma mau ngasih tips simpel aja kok, yaitu gimana caranya mengatasi game Assassins Creed UNITY yang sering kejadian input LAG ketika dimainkan.

Jadi yang dimaksud input LAG kali ini bukan karena framerate nya yang kecil, tapi emang ada "sesuatu" yang menyebabkan terjadinya delay ketika pemberian perintah dari joystick / gamepad.

Gimana cara atasi INPUT LAG?

Soo, gimana cara mengatasi input LAG ini???

1. Ganti bluetooth receiver yang lain

Jika kamu menggunakan gamepad wireless seperti dualshock PS3, atau gamepad apapun itu (intinya wireless), cobalah untuk menggunakan devices "bluetooth receiver" lainnya yang lebih bagus.
Jangan pakai bluetooth receiver yang terlalu murah!
Alasannya? Karena tidak semua game itu PASTI full compatible dengan bluetooth receiver yang kamu gunakan. Nah salah satu dampak negatifnya yaitu respon perintah / input jadi delay pada game-game tertentu.

2. Gunakan gampad berkabel saja

Nah poin nomor 2 ini yang kebetulan berhasil kami test dirumah. Yaitu dengan mengganti gamepad yang awalnya PS3 wireless menjadi stick lainnya yang masih pakai kabel.
Ingat, yang ada kebelnya!
Hanya saja kelemahannya jadi agak repot, karena harus menggunakan software x360ce agar gamepad tersebut bisa terbaca sebagai stik xbox Windows.

Nah beda dengan stik PS3 wireless! tanpa x360ce pun bisa terbaca sebagai xinput, asalkan OS Windows-mu sudah terinstall driver dari software SCP Toolkit.

3. update OS, update driver, update semuanya

Pastikan juga OS Windows sudah dalam kondisi terbaik!
Hanya sekedar tambahan saja, pastikan OS Windows, driver GPU, dan semuanya PASTIKAN udah up to date!

Catatan...

Udah sih itu aja tutorialnya, lagi males nulis banyak-banyak!

Kalo ada pertanyaan, langsung tulis aja di kolom komentar!

Sekian...

Itulah artikel mengenai Assassins Creed Unity: Gamepad INPUT LAG? Pakai Cara ini aja. Semoga informasi yang kami tuliskan melalui artikel di atas bisa bermanfaat bagi kalian yang membacanya.

Mohon maaf jika ada salah kata,

Sampai jumpa di lain waktu.

Terima kasih
“Tolong bagikan ke teman kamu jika menurutmu ini bermanfaat”


Selain sebagai media informasi teknologi, kami juga berbagi artikel terkait bisnis kreator.