Featured Post

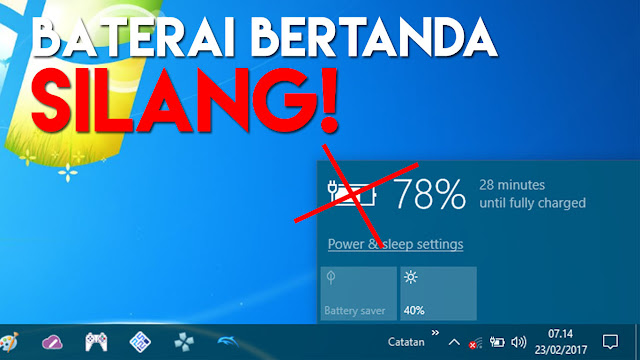
5 Cara AMPUH Menghilangkan Tanda Silang pada Baterai Laptop (fix)

Punya masalah laptop muncul tanda silang merah di indikator baterai? Pernahkah kamu mengalami keadaan di mana icon pada baterai laptop kesay...

Tuesday, November 9, 2021

Cara Mengatasi "Data Corruption" ketika Download pakai IDM (99% fix)

proses download IDM mengulang dari awal akibat "data corruption".
Proses download IDM mengulang dari awal akibat "data corruption".
Pernahkah kamu mengalami ketika men-download sebuah file, namun selalu gagal ngulang dari awal akibat "data corruption" yang ada di pemberitahuan IDM. Lebih jelasnya, mending kamu lihat kejadian data corruption seperti gambar di bawah ini:
proses download IDM gagal akibat data corruption
Pesan error IDM tersebut sering kami alami ketika download file dari Mediafire, dan untuk server lain sejauh ini belum pernah. (hanya berdasarkan pengalaman pribadi)

Hal tersebut tentu sangat menjengkelkan dikarenakan HARUS mengulang lagi dari awal. Dan lebih lucunya lagi, kejadian ini biasanya terjadi di angka 99%. (seolah-olah si IDM ini emang lagi ngePRANK dan iseng ama kita 😑)

Apalagi jika file yang sedang di download itu berukuran "gajah", tentu membutuhkan waktu dan effort yang lebih tinggi lagi. (sekaligus memicu pecahnya ledakan kemarahan😤)

Proses download mengalami "data corruption"

Belum lama ini telah kami temukan sebuah cara dalam mengatasi proses download file dari IDM yang sering gagal/muncul "data corruption", ataupun error lain bertuliskan "idm started to download the file from the beginning since data was corrupted".

Sebab, langkah yang kami tuliskan di bawah ini tujuannya hampir sama. (berkaitan dengan file corruption tadi)

Mengatasi "data corruption"

Langsung aja ya, ini dia caranya...
  1. Ketika download terhenti dan disertai error "data corruption", klik saja "NO" pada pilihan IDM. (lihat gambar dibawah)
    klik "NO" saja
  2. Setelah kamu klik "NO", maka proses download akan otomatis mengulang dari awal. Kejadian ini akan berulang terus menerus tanpa henti. Jadi yang perlu kamu lakukan adalah klik "NO" (langkah no 1.) kemudian lakukan PAUSE pada proses download. (lihat gambar dibawah)
    proses download sedang di PAUSE
  3. Selanjutnya klik refresh download address, kemudian tekan OK. Maka akan otomatis membuka halaman download dari file.
    klik OK
  4. Silahkan lakukan klik link unduh file kamu tadi. (IDM sedang menunggu address baru)
    cari link unduhan file terkait
  5. Setelah klik ulang link unduh, maka address sudah otomatis ter-update. (klik OK)
    address sudah terupdate (boleh lakukan resume dengan aman)
  6. Terakhir, lakukan RESUME pada daftar file unduhan di IDM.
    lakukan RESUME / START
Langkah di atas tujuannya untuk memastikan bahwa link / alamat address dari file yang sedang di download sudah dalam kondisi paling up to date / expired.

Setelah address sudah terbaharui, silahkan lanjut klik "RESUME" atau "START" pada IDM. (proses download sudah bisa di lanjutkan)

Tambahan: setting IDM (optional)

Setelah melakukan tips di atas, lakukan juga settingan IDM seperti gambar di bawah:
Intinya, mengubah jumlah koneksi maksimal yg bisa di terima
Buka IDM, klik "Option", klik "Connection", dst...

Jika sudah selesai, ubah settingan ke kondisi default. (kalo saya, max connection 16)

Catatan...

Perlu kami ingatkan, bahwa tips di atas tidak 100% "pasti" berhasil. Sebab, beberapa server file yang kamu unduh mungkin saja memang sudah rusak dari sananya, hingga menyebabkan proses transfer file mengalami error ketika proses penggabungan dari antrian part-part yang akan di download.

Kalo ingin mencobanya ya silahkan, kalo mau cari link di website lain juga nggak masalah... (mending cari link dari Google Drive saja)

Oke, itu saja...

Sekian...

Itulah artikel mengenai Cara Mengatasi "Data Corruption" ketika Download pakai IDM (fix). Semoga informasi yang kami tuliskan melalui artikel di atas bisa bermanfaat bagi kalian yang membacanya.

Mohon maaf jika ada salah kata,

Sampai jumpa di lain waktu.

Terima kasih
“Tolong bagikan ke teman kamu jika menurutmu ini bermanfaat”


Selain sebagai media informasi teknologi, kami juga berbagi artikel terkait bisnis kreator.

8 Kelebihan dan Kekurangan Visual Studio Code vs. Sublime Text 3

Visual Studio Code vs. Sublime Text 3, mana yang lebih bagus?
Sudah hampir 1 tahun kami menggunakan Sublime Text ketika melakukan coding sederhana seperti edit template, edit widget dan beberapa bahasa pemrograman lain yang sekiranya kami mengerti. Btw, aplikasi Sublime Text ini di rekomendasikan oleh teman ketika sedang internetan di wifi.id 😁

Nah tapi, semua itu berubah ketika kami mengenal sebuah aplikasi teks editor lain yang bernama Visual Studio Code.

Tampilan Visual Studio Code...

Dari segi tampilan, secara default aplikasi ini lebih dominan ke warna hitam / dark.
lebih dominan ke warna hitam / dark.
Sebenarnya itulah yang menjadi alasan utama kami ketika awal2 mencoba aplikasi teks editor ini. Karena sebelumnya pernah juga mencoba aplikasi lain seperti Notepad+, Atom, dll rasanya kurang betah aja karena dominan ke warna putih.

Ya walaupun bisa juga di ubah theme melalui setting, rasanya agak males kalo harus atur2 ulang. (apalagi kami sangat sering melakukan yang namanya re-install OS Windows)

Nah beda dengan Visual Studio Code, seperti yang sudah kami katakan di atas tadi bahwa tampilan awal (default) sudah berada di mode gelap. (tidak perlu install template, apalagi plugin tambahan)

Visual Studio Code vs. Sublime Text 3

Dikarenakan Sublime Text 3 juga merupakan teks editor yang kami sukai, maka kali ini kami akan mencoba bandingkan dengan Visual Studio Code yang baru2 ini sering kami pakai.

Perlu diketahui terlebih dahulu, ini hanyalah opini berdasarkan apa yang kami rasakan ketika menggunakannya. Beda orang, mungkin akan beda rasa.

Kelebihan Visual Studio Code dibanding Sublime Text 3, yang pertama adalah...

1. VSCode Gratis

tinggal download aja di website resmi, gratis
Gratis, tidak perlu bayar ataupun repot2 nge-bajak nyari serial di internet.

2. Terinstall otomatis fungsi EMMET

fungsi EMMET sudah terintegrasi (default)
Fungsi auto complete dalam penulisan kode pemrograman.

3. terinstall otomatis fungsi LINTER & INTELLISENSE

otomatis fungsi LINTER & INTELLISENSE
Fungsi error checker yang sangat-sangat membantu ketika lagi nulis/edit kode pemrograman.

4. Kemudahan Bekerja dengan Warna

preview kode warna sudah ada
Jika menulis kode warna, maka akan otomatis muncul preview dari kode warna yang ditulis.

5. Punya Sidebar Kaya akan Fitur

banyak tools yang tersedia (plugin store, search, dll)
Sidebar ini hampir mirip dengan taskbar yang ada di OS Windows. (akan ada banyak tools yang tersedia yang siap digunakan)

6. Mudah Mengelola Extensions

Pengelolaan ekstension tergolong mudah, walaupun baru pertama kali pakai

7. Mudah Terintegrasi dengan GIT

Fitur yang ini jarang kami pakai, karena memang belum begitu mengerti dan masih belajar.

8. Belum ada tambahan...

Sejauh ini belum ada tambahan kelebihan yang lain.

Beberapa info kelebihan diatas, ada juga yang baru kami sadari setelah menonton video dari channel Web Programming UNPAS. (terutama di fitur EMMET, LINTER dan INTELLISENSE)

Misal jika ada yang belum pernah liat videonya, bisa lihat dibawah...


Jujur, setelah melihat video diatas kami baru menyadari bahwa VS Code ternyata memiliki fitur-fitur lain yang belum kami coba. (ada juga yang sudah coba, tapi justru tidak nyadar kalo itu salah satu kelebihan yang tidak dimiliki Sublime Text)

Kekurangan Visual Studio Code...

Satu-satunya kelemahan dari Visual Studio Code itu cuma di peforma aja. Yap, jika di bandingkan dengan Sublime Text, si Visual Studio Code ini ternyata lebih berat!!! Apalagi bagi kamu pengguna OS Windows dengan RAM 4GB kebawah.
Tampilan keseluruhan Visual Studio Code
Software Visual Studio Code ini sepertinya akan optimal jika dijalankan dengan spesifikasi hardware minimal CPU 2 core / 4 thread, 4GB+ RAM.

Untuk RAM 4GB ditahun ini sebenarnya juga masih kurang (menurut saya), sebab di tahun ini sebagian update aplikasi menuntut sisa ruang RAM yang tinggi juga. (firefox, chrome, photoshop)


Kesimpulan..

Sublime Text sebenarnya udah cukup bagus, tapi sayangnya terkadang juga bikin jengkel sering muncul notifikasi disuruh registrasi 😔Jadi ya kalo dipikir2, untuk saat ini (sementara) pindah dulu ke Visual Studio Code 👌

Catatan...

Ingat, poin-poin yang kami tuliskan di atas merupakan pendapat pribadi dari kami sendiri. Jadi wajar saja jika terdapat beberapa hal yang tidak sesuai/sependapat dengan kamu-kamu yang sedang membaca artikel ini.

Sedangkan bagi kamu yang tidak sengaja kesasar di blog ini, saran kami JANGAN langsung keluar. Mending liat-liat dulu Daftar Isi dari kumpulan artikel yang telah kami tulis blog sederhana ini.

Bisa jadi, kamu akan menemukan artikel terkait lainnya.

Itu saja sarannya...

Sekian...

Itulah artikel mengenai 8 Kelebihan dan Kekurangan Visual Studio Code vs. Sublime Text 3. Semoga informasi yang kami tuliskan melalui artikel di atas bisa bermanfaat bagi kalian yang membacanya.

Mohon maaf jika ada salah kata,

Sampai jumpa di lain waktu.

Terima kasih
“Tolong bagikan ke teman kamu jika menurutmu ini bermanfaat”


Selain sebagai media informasi teknologi, kami juga berbagi artikel terkait bisnis kreator.

Windows 32 Bit vs 64 Bit, Mana yang Lebih Baik untuk GAMING & EDITOR?

Windows 32 Bit VS 64 Bit, Mana yang Benar-benar Lebih Baik?
Windows 32 Bit vs 64 Bit, mana yang paing cocok untuk GAMING & EDITOR?
Bukan menjadi hal yang rahasia lagi bahwa Microsoft Windows saat ini menjadi Sistem Operasi yang paling banyak digunakan di dunia. Mulai dari seorang pelajar, guru, maupun pengusaha, banyak dari mereka yang menggunakan Sistem Operasi Windows.

Namun tahukah kalian bahwa sistem operasi Windows tersebut terbagi menjadi 2 jenis yang berbeda. Yaitu Windows 32 Bit dengan Windows 64 Bit.

Menurut kalian, mengapa software-software berat misalnya Adobe Premiere, After Effect, dan juga game berat seperti Grand Theft Auto V mengharuskan kalian untuk menggunakan Windows 64 Bit?

Apa sih perbedaan antara Windows 32 Bit dengan Windows 64 Bit?

Perbedaan Umum...

Sebelum membahas mengenai perbedaan antara Windows 32 Bit dengan Windows 64 Bit, terlebih dahulu kalian harus mengetahui beberapa kelebihan maupun kekurangan yang ada pada Sistem Operasi tersebut.

Kelebihan Windows 32 Bit

  • Bisa menjalankan software jadul berbasis 16 Bit
  • Lebih optimal pada komputer/laptop dengan RAM 2GB, yang artinya juga cocok untuk komputer/laptop jadul.

Kekurangan Windows 32 Bit

  • Jumlah maksimal RAM hanya 4GB saja. (tidak bisa lebih)
  • Tidak bisa menjalankan software terbaru seperti Adobe Premiere CC, After Effect CC, maupun juga game fenomenal "Grand Theft Auto V". (kebanyakan software saat ini mengharuskan basis 64 Bit)

Kelebihan Windows 64 Bit

  • Jumlah maksimal RAM yang di pakai bisa lebih dari 4GB. (64GB atau 128GB OK)
  • Dapat menjalankan software basis 32 Bit maupun 64 Bit.
  • Sangat cocok untuk menjalankan software dan game jenis terbaru. (Premiere CC, After Effect CC, Grand Theft Auto V)

Kekurangan Windows 64 Bit

  • Tidak cocok untuk komputer/laptop jadul

Nah setelah kalian membaca perbandingan di atas, paling tidak kalian sudah mengetahui perbedaan umum antara Windows 32 Bit dengan Windows 64 Bit.

Manakah yang Paling Cepat?

Apabila kalian menggunakan Windows jenis 64 Bit, tentu saja hal tersebut berpotensi akan membuka batasan-batasan yang tidak di miliki oleh Windows jenis 32 Bit.

Apa sajakah batasan-batasan tersebut?

1. Jumlah Maksimal RAM

Perbedaan paling mencolok sekaligus yang sudah banyak di ketahui sebagian pengguna Windows adalah batasan jumlah RAM. Pada Windows 32 Bit, maksimal jumlah RAM yang dapat terbaca yaitu di bawah 4GB. Sedangkan Windows 64 Bit dapat membaca jumlah RAM lebih dari 4GB.

2. Peforma...

Teknologi processor 64 Bit merupakan jenis prosesor yang tergolong baru yang bisa di pastikan memiliki kemampuan di atas processor 32 Bit. Jadi, apabila kalian ingin mendapatkan peforma terbaik dalam proses editing ataupun gaming, Windows 64 Bit merupakan pilihan yang tepat.

3. Kecepatan Memproses Data

Angka 32 Bit dengan 64 Bit sebenarnya mewakili jumlah data yang dapat di proses dalam sekali perintah. Jadi, secara teknis Windows 64 bisa melakukan suatu proses yang lebih cepat di bandingkan Windows 32 bit.

4. Kompatibilitas...

Pada Windows berbasis 64 Bit mampu menjalankan software 32 Bit maupun 64 Bit. Berbeda dengan Windows 32 Bit yang hanya mampu menjalankan software 32 Bit saja.

Kesimpulan...

Windows berbasis 64 Bit memang lebih unggul di bandingkan dengan Windows 32 Bit. Akan tetapi, Seberapa cepat suatu perangkat komputer tentu saja bukan hanya karena jenis Windows yang di gunakan (32 Bit atau 64 Bit).

Tetap saja bagian hardware merupakan yang paling utama.

Pertanyaan...

Jadi, kalian mau pilih OS Windows yang mana? Versi 32 Bit atau 64 Bit?

Kalian Editor Film?

Kalian Gamer?

Youtuber?

Sekian...

Semoga artikel yang kami tuliskan di atas bisa bermanfaat bagi kalian yang membaca. Terutama yang masih belum begitu mengerti tentang Windows 32 Bit ataupun Windows 64 Bit.

Sekian dulu untuk artikel kali ini,

Terima kasih...

Selain sebagai media informasi teknologi, kami juga berbagi artikel terkait bisnis kreator.

Monday, November 8, 2021

Fungsi-Fungsi Shortcut Keyboard Windows 11 Terlengkap

Daftar Fungsi-Fungsi Shortcut Keyboard pada Windows 11 Terlengkap dan Terbaru. Pintasan keyboard adalah tombol atau kombinasi tombol yang menyediakan cara alternatif untuk melakukan sesuatu yang biasanya Anda lakukan dengan mouse.
Shortcut Keyboard Windows 11

Fungsi Shortcut Keyboard Windows 11

Press this key

To do this

Ctrl + X

Cut the selected item.

Ctrl + C (or Ctrl + Insert)

Copy the selected item.

Ctrl + V (or Shift + Insert)

Paste the selected item.

Ctrl + Z

Undo an action.

Alt + Tab

Switch between open apps.

Alt + F4

Close the active item, or exit the active app.

Windows logo key  + L

Lock your PC.

Windows logo key  + D

Display and hide the desktop.

F2

Rename the selected item.

F3

Search for a file or folder in File Explorer.

F4

Display the address bar list in File Explorer.

F5

Refresh the active window.

F6

Cycle through screen elements in a window or on the desktop.

F10

Activate the Menu bar in the active app.

Alt + F8

Show your password on the sign-in screen.

Alt + Esc

Cycle through items in the order in which they were opened.

Alt + underlined letter

Perform the command for that letter.

Alt + Enter

Display properties for the selected item.

Alt + Spacebar

Open the shortcut menu for the active window.

Alt + Left arrow

Go back.

Alt + Right arrow

Go forward.

Alt + Page Up

Move up one screen.

Alt + Page Down

Move down one screen.

Ctrl + F4

Close the active document (in apps that are full-screen and let you have multiple documents open at the same time).

Ctrl + A

Select all items in a document or window.

Ctrl + D (or Delete)

Delete the selected item and move it to the Recycle Bin.

Ctrl + E

Open Search (in most apps).

Ctrl + R (or F5)

Refresh the active window.

Ctrl + Y

Redo an action.

Ctrl + Right arrow

Move the cursor to the beginning of the next word.

Ctrl + Left arrow

Move the cursor to the beginning of the previous word.

Ctrl + Down arrow

Move the cursor to the beginning of the next paragraph.

Ctrl + Up arrow

Move the cursor to the beginning of the previous paragraph.

Ctrl + Alt + Tab

Use the arrow keys to switch between all open apps.

Alt + Shift + arrow keys

When a group or tile is in focus on the Start menu, move it in the direction specified.

Ctrl + Shift + arrow keys

When a tile is in focus on the Start menu, move it into another tile to create a folder.

Ctrl + arrow keys

Resize the Start menu when it's open.

Ctrl + arrow key (to move to an item) + Spacebar

Select multiple individual items in a window or on the desktop.

Ctrl + Shift with an arrow key

Select a block of text.

Ctrl + Esc

Open Start.

Ctrl + Shift + Esc

Open Task Manager.

Ctrl + Shift

Switch the keyboard layout when multiple keyboard layouts are available.

Ctrl + Spacebar

Turn the Chinese input method editor (IME) on or off.

Shift + F10

Display the shortcut menu for the selected item.

Shift with any arrow key

Select more than one item in a window or on the desktop, or select text in a document.

Shift + Delete

Delete the selected item without moving it to the Recycle Bin first.

Right arrow

Open the next menu to the right, or open a submenu.

Left arrow

Open the next menu to the left, or close a submenu.

Esc

Stop or leave the current task.

PrtScn

Take a screenshot of your whole screen and copy it to the clipboard. 

Note

  • You can change this shortcut so it also opens  screen snipping, which lets you edit your screenshot. Select Start  > Settings > Ease of Access > Keyboard, and turn on the toggle under Print Screen shortcut.

Use PrtScn key to open screen snipping

Press this key

To do this

Windows logo key

Open or close Start.

Windows logo key  + A

Open Quick Settings.

Windows logo key  + B

Set focus for the Show hidden icons dropdown menu.

Windows logo key  + C

Open Chat from Microsoft Teams.

Windows logo key  + Shift + C

Open the charms menu.

Windows logo key  + Ctrl + C

Turn on color filters (enable this shortcut first in Color Filter settings).

Windows logo key  + D

Display and hide the desktop.

Windows logo key  + E

Open File Explorer.

Windows logo key  + F

Open Feedback Hub and take a screenshot.

Windows logo key  + G

Open Xbox Game Bar when a game is open.

Windows logo key  + H

Launch voice typing.

Windows logo key  + I

Open Settings.

Windows logo key  + J

Set focus to a Windows tip when one is available.

When a Windows tip appears, bring focus to the Tip.  Pressing the keyboard shortcuts again to bring focus to the element on the screen to which the Windows tip is anchored.

Windows logo key  + K

Open Cast from Quick Settings.

Windows logo key  + L

Lock your PC or switch accounts.

Windows logo key  + M

Minimize all windows.

Windows logo key  + Shift + M

Restore minimized windows on the desktop.

Windows logo key  + N

Open notification center and calendar.

Windows logo key  + O

Lock device orientation.

Windows logo key  + P

Choose a presentation display mode.

Windows logo key  + Ctrl + Q

Open Quick Assist.

Windows logo key  + R

Open the Run dialog box.

Windows logo key  + Alt + R

Record video of game window in focus (using Xbox Game Bar).

Windows logo key  + S

Open search.

Windows logo key  + Shift + S

Take a screenshot of part of your screen.

Windows logo key  + T

Cycle through apps on the taskbar.

Windows logo key  + U

Open Accessibility Settings.

Windows logo key  + V

Open the clipboard history. 

Note

  • If you don't want to see the prompt for this shortcut, select Start  > Settings  > System  > Clipboard, and turn on the toggle under Clipboard history.

Windows logo key  + Shift + V

Set focus to a notification.

Windows logo key  + W

Open Widgets.

Windows logo key  + X

Open the Quick Link menu.

Windows logo key  + Y

Switch input between Windows Mixed Reality and your desktop.

Windows logo key  + Z

Open the snap layouts.

Windows logo key  + period (.) or semicolon (;)

Open emoji panel.

Windows logo key  + comma (,)

Temporarily peek at the desktop.

Windows logo key  + Pause

Display the System Properties dialog box.

Windows logo key  + Ctrl + F

Search for PCs (if you're on a network).

Windows logo key  + number

Open the desktop and start the app pinned to the taskbar in the position indicated by the number. If the app is already running, switch to that app.

Windows logo key  + Shift + number

Open the desktop and start a new instance of the app pinned to the taskbar in the position indicated by the number.

Windows logo key  + Ctrl + number

Open the desktop and switch to the last active window of the app pinned to the taskbar in the position indicated by the number.

Windows logo key  + Alt + number

Open the desktop and open the Jump List for the app pinned to the taskbar in the position indicated by the number.

Windows logo key  + Ctrl + Shift + number

Open the desktop and open a new instance of the app located at the given position on the taskbar as an administrator.

Windows logo key  + Tab

Open Task view.

Windows logo key  + Up arrow

Maximize the window.

Windows logo key  + Alt + Up arrow

Snap window in focus to top half of screen (🆕 with Windows 11).

Windows logo key  + Down arrow

Remove current app from screen or minimize the desktop window.

Windows logo key  + Alt + Down arrow

Snap window in focus to bottom half of screen (🆕 with Windows 11).

Windows logo key  + Left arrow

Maximize the app or desktop window to the left side of the screen.

Windows logo key  + Right arrow

Maximize the app or desktop window to the right side of the screen.

Windows logo key  + Home

Minimize all except the active desktop window (restores all windows on second stroke).

Windows logo key  + Shift + Up arrow

Stretch the desktop window to the top and bottom of the screen.

Windows logo key  + Shift + Down arrow

Restore/minimize active desktop windows vertically, maintaining width.

Windows logo key  + Shift + Left arrow or Right arrow

Move an app or window in the desktop from one monitor to another.

Windows logo key  + Shift + Spacebar

Cycle backwards through language and keyboard layout.

Windows logo key + Spacebar

Switch input language and keyboard layout.

Windows logo key + Ctrl + Spacebar

Change to a previously selected input.

Windows logo key  + Ctrl + Enter

Turn on Narrator.

Windows logo key  + Plus (+)

Open Magnifier and zoom in.

Windows logo key  + Minus (-)

Zoom out in Magnifier.

Windows logo key  + Esc

Close Magnifier.

Windows logo key  + forward slash (/)

Begin IME reconversion.

Windows logo key  + Ctrl + Shift + B

Wake PC from blank or black screen.

Windows logo key  + PrtScn

Save full screen screenshot to file.

Windows logo key  + Alt + PrtScn

Save screenshot of game window in focus to file (using Xbox Game Bar).

Press this key

To do this

Ctrl + C (or Ctrl + Insert)

Copy the selected text.

Ctrl + V (or Shift + Insert)

Paste the selected text.

Ctrl + M

Enter Mark mode.

Alt + selection key

Begin selection in block mode.

Arrow keys

Move the cursor in the direction specified.

Page up

Move the cursor by one page up.

Page down

Move the cursor by one page down.

Ctrl + Home (Mark mode)

Move the cursor to the beginning of the buffer.

Ctrl + End (Mark mode)

Move the cursor to the end of the buffer.

Ctrl + Up arrow

Move up one line in the output history.

Ctrl + Down arrow

Move down one line in the output history.

Ctrl + Home (History navigation)

If the command line is empty, move the viewport to the top of the buffer. Otherwise, delete all the characters to the left of the cursor in the command line.

Ctrl + End (History navigation)

If the command line is empty, move the viewport to the command line. Otherwise, delete all the characters to the right of the cursor in the command line.

Press this key

To do this

F4

Display the items in the active list.

Ctrl + Tab

Move forward through tabs.

Ctrl + Shift + Tab

Move back through tabs.

Ctrl + number (number 1–9)

Move to nth tab.

Tab

Move forward through options.

Shift + Tab

Move back through options.

Alt + underlined letter

Perform the command (or select the option) that is used with that letter.

Spacebar

Select or clear the check box if the active option is a check box.

Backspace

Open a folder one level up if a folder is selected in the Save As or Open dialog box.

Arrow keys

Select a button if the active option is a group of option buttons.

Press this key

To do this

Alt + D

Select the address bar.

Ctrl + E

Select the search box.

Ctrl + F

Select the search box.

Ctrl + N

Open a new window.

Ctrl + W

Close the active window.

Ctrl + mouse scroll wheel

Change the size and appearance of file and folder icons.

Ctrl + Shift + E

Display all folders above the selected folder.

Ctrl + Shift + N

Create a new folder.

Num Lock + asterisk (*)

Display all subfolders under the selected folder.

Num Lock + plus (+)

Display the contents of the selected folder.

Num Lock + minus (-)

Collapse the selected folder.

Alt + P

Display the preview panel.

Alt + Enter

Open the Properties dialog box for the selected item.

Alt + Right arrow

View the next folder.

Alt + Up arrow

View the folder that the folder was in.

Alt + Left arrow

View the previous folder.

Backspace

View the previous folder.

Right arrow

Display the current selection (if it's collapsed), or select the first subfolder.

Left arrow

Collapse the current selection (if it's expanded), or select the folder that the folder was in.

End

Display the bottom of the active window.

Home

Display the top of the active window.

F11

Maximize or minimize the active window.

Press this key

To do this

Windows logo key  + Tab

Open Task view.

Windows logo key  + Ctrl + D

Add a virtual desktop.

Windows logo key  + Ctrl + Right arrow

Switch between virtual desktops you’ve created on the right.

Windows logo key  + Ctrl + Left arrow

Switch between virtual desktops you’ve created on the left.

Windows logo key  + Ctrl + F4

Close the virtual desktop you're using.

Press this key

To do this

Shift + click a taskbar button

Open an app or quickly open another instance of an app.

Ctrl + Shift + click a taskbar button

Open an app as an administrator.

Shift + right-click a taskbar button

Show the window menu for the app.

Shift + right-click a grouped taskbar button

Show the window menu for the group.

Ctrl + click a grouped taskbar button

Cycle through the windows of the group.

Press this key

To do this

Windows logo key  + I

Open settings.

Backspace

Go back to the settings home page.

Type on any page with search box

Search settings.